How to Reduce Email Bounces and Protect Deliverability
Learn proven strategies to reduce email bounces and boost deliverability with simple actions that enhance your email campaigns.

How to Reduce Email Bounces and Protect Deliverability
Before your next send, do these five things: run a bulk verification on your list and suppress every address flagged as invalid; pull your campaign bounce logs and immediately add all hard bounces to your suppression list; confirm SPF, DKIM, and DMARC are configured on your sending domain; add a real-time validation API at every signup form and turn on double opt-in; and if your sender reputation is already damaged, pause large sends and restart with a warm-up plan at reduced volume.
That sequence, done in order, handles the majority of avoidable bounces. According to BounceShift, bulk verification of an existing list combined with real-time validation at signup are the two highest-leverage interventions available, often producing large, immediate drops in bounce rate within a single campaign cycle.
Quick action checklist:
- Run bulk verification and suppress invalid/risky addresses before the next send
- Export bounce logs, separate hard from soft bounces, and suppress all hard bounces immediately
- Verify SPF, DKIM, and DMARC records on your sending domain or subdomain
- Add real-time email validation at point of capture; enable double opt-in for new signups
- If reputation is damaged, pause large sends and begin a structured warm-up at 25–50% of normal volume
Key Takeaways
| Point | Details |
|---|---|
| Verify before every send | Bulk-verify your list before major campaigns; lists degrade 22–30% annually, so stale addresses accumulate fast. |
| Hard bounces are permanent | Suppress 5xx addresses immediately and never re-add them; retry 4xx soft bounces up to 3 times over 72 hours. |
| Authentication is non-negotiable | SPF, DKIM, and DMARC on a dedicated sending subdomain are the baseline; start DMARC at p=none and tighten after confirming legitimate mail passes. |
| Watch these thresholds | Campaign bounce rate above 1.5% triggers a pause; hard-bounce ratio above 0.5% triggers re-verification; complaint rate above 0.1% requires a content and targeting review. |
| Runleadpilot manages this layer | Runleadpilot provisions dedicated domains, runs verification automatically, and manages warm-up so B2B teams do not maintain a separate deliverability stack. |
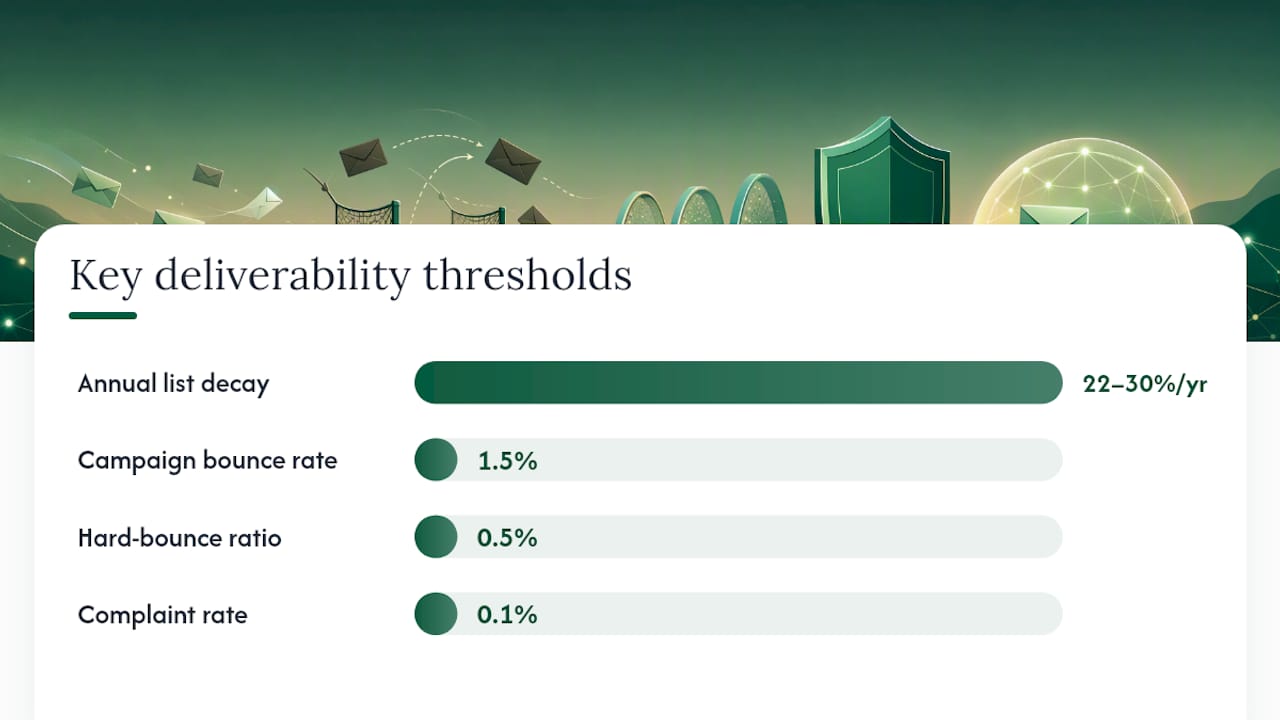
Table of Contents
- What the difference between hard and soft bounces actually means for your list
- How to triage a campaign that just generated high bounces
- List hygiene and acquisition practices that prevent bounces over time
- Technical deliverability: SPF, DKIM, DMARC, and warm-up schedules
- Sending strategy and content tweaks that cut soft bounces
- Which tools and metrics should you actually monitor?
- Suppression policy: the rules your team needs in writing
- How Runleadpilot handles deliverability so you do not have to
- The mistakes that actually hurt you, and the fixes that actually work
- Runleadpilot handles the deliverability work your team keeps deprioritizing
- Sources
What the difference between hard and soft bounces actually means for your list
A bounce happens when a receiving mail server rejects your message and returns an error code. Your bounce rate is calculated simply: bounces divided by total emails sent, multiplied by 100. The critical distinction is whether that rejection is permanent or temporary, because the correct response to each is completely different.
Hard bounces are permanent rejections, signaled by SMTP 5xx codes. Common examples:
550 5.1.1— User unknown or mailbox does not exist550 5.1.2— Bad destination mailbox address553 5.1.3— Invalid address format
When a server returns a 5xx code, it is telling you definitively that the address cannot receive mail. Omnisend confirms that hard-bounced addresses should be removed from your list immediately and never emailed again. Continuing to send to them signals to inbox providers that your list hygiene is poor, which damages your sender reputation across all your sends.
Soft bounces are temporary failures, signaled by SMTP 4xx codes:
421— Service temporarily unavailable (often greylisting)450— Mailbox temporarily unavailable or full451— Server-side processing error
A 4xx response means “try again later,” not “give up.” The right approach is to retry with exponential backoff. A practical rule of thumb: if an address soft-bounces across three delivery attempts over 72 hours, convert it to a suppression. Continuing to retry beyond that point adds noise to your sending reputation without meaningful upside.
Catch-all domains add a layer of complexity here. Some organizations configure their mail server to accept all incoming mail at their domain, regardless of whether the specific mailbox exists. Verification tools often return “unknown” or “accept-all” for these addresses because the server never rejects the probe. Sending to catch-all addresses without additional risk scoring means some will hard-bounce at delivery time. Treat catch-all results as a separate risk bucket rather than confirmed valid addresses.
Pro Tip: Set up automated bounce classification in your ESP. Most platforms (Mailchimp, Klaviyo, HubSpot, ActiveCampaign) will auto-suppress hard bounces, but verify that the rule is active and covers all sending streams, including transactional.
How to triage a campaign that just generated high bounces
Speed matters here. The longer you keep sending to a bouncing list, the more reputation damage accumulates.
- Stop or pause the send immediately if your campaign bounce rate exceeds 2%. Continuing to push volume into a high-bounce environment compounds the problem with every message sent.
- Export the full bounce log from your ESP. Separate the log into two groups: hard bounces (5xx codes) and soft bounces (4xx codes). Add every hard bounce address to your suppression list before doing anything else.
- Run the remaining active list through bulk verification. Flag addresses returned as “invalid,” “disposable,” or “high risk” for suppression or a separate risk bucket. Tools like NeverBounce, ZeroBounce, and Kickbox handle this at scale and return confidence scores per address.
- Resume at reduced volume. Send only to your most engaged segment first — contacts who opened or clicked in the last 30 days. Start at 25–50% of your normal send volume and monitor closely for 7–14 days before scaling back up.
- Watch your metrics daily during recovery. Track campaign bounce rate, hard-bounce ratio, and complaint rate. If any metric spikes again, pause and re-verify before continuing.
- Document and automate the workflow. The triage process should not be a one-time fire drill. Build it into your ESP as an automated rule: any campaign that crosses a bounce threshold triggers a pause and a verification job.
A pre-send checklist that includes verification, suppression of recent bounces, authentication checks, and seed testing prevents most of these situations from arising in the first place. Triage is the fix; prevention is the goal.
Pro Tip: Recovery from reputational damage typically takes 2–6 weeks of disciplined, reduced-volume sending. Rushing back to full volume before your metrics stabilize restarts the damage cycle.
List hygiene and acquisition practices that prevent bounces over time
The cleanest path to a low bounce rate is never letting bad addresses onto your list in the first place. These practices, layered together, do exactly that.
At the point of capture:
- Deploy a real-time validation API (NeverBounce, ZeroBounce, or similar) on every signup form. It checks syntax, domain existence, and mailbox status before the address is written to your database.
- Add typo correction suggestions for common domains (“gmial.com → gmail.com?”).
- Block disposable and temporary email domains. Services like Mailcheck.ai maintain updated blocklists of throwaway providers.
- Implement double opt-in. A confirmation email sent immediately after signup filters out mistyped addresses and unengaged signups before they ever reach a campaign list.
Ongoing verification cadence:
According to BulkEmailChecker’s playbook, email lists degrade significantly over a year. Addresses go stale as people change jobs, abandon accounts, or switch providers. That decay rate justifies a structured re-verification schedule:
- Re-verify the full list quarterly for stable, low-turnover audiences.
- Re-verify monthly for high-turnover B2B prospecting lists, where job changes are frequent.
- Always run a bulk verification pass before any major campaign send, regardless of when you last cleaned.
Purchased and scraped lists are a different category entirely. They are not a shortcut; they are a liability. Klaviyo’s analysis is direct on this: purchased or scraped lists drive bounces and damage sender reputation, and inbox providers reward organic, opted-in growth. Beyond deliverability, FTC CAN-SPAM guidance requires that commercial email recipients have a clear opt-out path, which is structurally incompatible with lists you bought from a third party.
Engagement segmentation and sunset policy:
- Segment by recency. Contacts who have not opened or clicked in 90 days get a re-engagement sequence before any promotional send.
- After a re-engagement flow fails (no open, no click, no reply), suppress or archive the contact. A common window is 180 days of total inactivity as the final threshold.
- Maintain a permanent suppression list and automate the rules: hard bounces in, never out.
Technical deliverability: SPF, DKIM, DMARC, and warm-up schedules
Authentication is not optional. Without it, receiving servers have no way to verify that your email is legitimate, and they will route it to spam or reject it outright. Mailthentic’s guide confirms that SPF, DKIM, and DMARC configuration, combined with a branded sending domain, are the core technical defenses against delivery failures.

SPF (Sender Policy Framework): Publishes a DNS TXT record listing the IP addresses and services authorized to send mail on behalf of your domain. Common pitfalls include exceeding the 10 DNS lookup limit (which causes SPF to fail silently) and forgetting to include third-party senders like your ESP or CRM.
DKIM (DomainKeys Identified Mail): Adds a cryptographic signature to outgoing messages. The receiving server checks the signature against a public key in your DNS. This confirms the message was not altered in transit and that it genuinely originated from your domain.
DMARC (Domain-based Message Authentication, Reporting & Conformance): Ties SPF and DKIM together and tells receiving servers what to do when a message fails both checks. Start with p=none to collect reports without blocking any mail, then move to p=quarantine once you have confirmed all legitimate sending sources pass authentication, and eventually to p=reject for maximum protection.
Sending domain setup: Use a dedicated sending subdomain (e.g., mail.yourdomain.com or outreach.yourdomain.com) rather than your root domain. This isolates your sending reputation from your main domain’s web and transactional traffic. Never send cold outreach from a free or shared domain.
Example warm-up schedule for a new sending domain or IP:
If engagement drops or bounce rate spikes at any stage, hold volume at the current level for another week before advancing. For a practical overview of managed warm-up tools built for B2B teams, that resource covers the major options.
Pro Tip: Monitor DMARC aggregate reports weekly during the first 30 days after enabling authentication. Google Postmaster Tools and Microsoft SNDS both provide domain-level reputation data that surfaces authentication failures before they become delivery problems.
Sending strategy and content tweaks that cut soft bounces
Soft bounces are often a signal from the receiving server that you are sending too much, too fast, or to the wrong segment. Adjusting your sending behavior directly reduces their frequency.
Segment by engagement recency first. Send your highest volumes to contacts who engaged in the last 30 days. Contacts in the 31–90 day window get lighter cadences. Anything beyond 90 days goes through a re-engagement flow before any promotional send. ISPs watch engagement signals closely, and a list full of unresponsive contacts pulls your sender score down even when the addresses are technically valid.
Keep message size lean. Large HTML emails with embedded images are slower to process and more likely to trigger content-based filtering. Host images externally on a CDN rather than embedding them, keep HTML clean and well-formed, and avoid attachments in cold or prospecting emails entirely.
Throttle sends to major providers. Gmail, Outlook, and Yahoo each have per-domain rate limits. Sending 50,000 messages to Gmail addresses in a single burst will trigger throttling, which shows up as 4xx soft bounces. Stagger batches across time windows, typically 2–4 hour blocks, and spread volume across the day.
Retry logic for soft bounces:
- First retry: 30 minutes after the initial failure.
- Second retry: 4 hours after the first retry.
- Third retry: 24 hours after the second retry.
- If still failing after three attempts over 72 hours, move the address to suppression.
For a deeper look at follow-up cadence and retry sequencing, that guide covers the timing logic in detail.
Pro Tip: Run seed tests to major providers (Gmail, Outlook, Yahoo) before any large campaign. Inbox placement tools like GlockApps or Litmus Email Analytics show you whether your message is landing in the inbox, spam folder, or being rejected outright, before your real recipients see it.
Which tools and metrics should you actually monitor?
The right toolset covers four distinct jobs: verifying addresses, testing inbox placement, monitoring authentication, and tracking performance thresholds.
Tool categories to have in place:
- Real-time verification APIs: NeverBounce, ZeroBounce, Kickbox. Use at signup and before any send to a list that has not been recently verified.
- Bulk verification services: The same providers above offer batch processing. Upload a CSV, get back a scored list with “valid,” “invalid,” “catch-all,” and “unknown” classifications.
- Inbox placement and seed testing: GlockApps, Litmus, or Mail-Tester. Send a test message to a seed list across major providers and see exactly where it lands.
- DMARC reporting: Dmarcian, Valimail, or EasyDMARC aggregate and parse DMARC XML reports into readable dashboards. Essential during the first 60 days after enabling authentication.
- Blacklist monitoring: MXToolbox checks your sending IP and domain against major blacklists. A blacklist listing explains sudden delivery failures that look like bounces.
When selecting a verification provider, check for:
- Accuracy rate and how they handle catch-all domains (do they return a confidence score or just “unknown”?)
- API response latency for real-time use cases (under 300ms is the practical threshold for form validation)
- US data privacy compliance, particularly if you are processing contact data under state privacy laws
Threshold alerts and automated actions:
SendSure’s deliverability benchmarks classify campaign bounce rates below 1% as excellent, 1–2% as acceptable, and above 5% as critical. Build those thresholds into your ESP’s automated alerts so you catch problems before they compound.
For inbox placement specifically: run seed tests to Gmail, Outlook, and Yahoo before any campaign over 5,000 recipients. A tracking and placement tool built for B2B outbound teams can automate this check as part of your pre-send workflow.
Suppression policy: the rules your team needs in writing
A suppression policy is not a technical setting; it is an operational decision that needs to be documented, automated, and enforced consistently across every sending stream.
Hard bounces:
- Suppress immediately upon receiving a 5xx permanent error. No retries, no exceptions.
- The suppression is permanent. Never re-add a hard-bounced address to a sending list, even if a contact later provides the same address through a new form submission (verify it fresh first).
Soft bounces:
- Attempt automated retries: 2–3 attempts over 48–72 hours with exponential backoff between each.
- If the address still fails after the retry window, move it to suppression.
- Review suppressed soft bounces quarterly. A small percentage may recover (the mailbox was temporarily full or the server was down). Re-verify before re-adding.
Inactivity and sunset policy:
- At 90 days of no engagement (no open, click, or reply), move the contact into a re-engagement sequence.
- Send 2–3 re-engagement messages over 2–3 weeks.
- If no response, suppress or archive the contact. Do not continue sending promotional mail to unresponsive addresses.
- Document the inactivity window in your ESP as an automated segment rule, not a manual process.
Catch-all and “unknown” addresses:
- Do not send broadly to catch-all results. Instead, create a separate low-volume test bucket.
- Send a single message to a small sample (10–15% of the catch-all segment) and measure the hard-bounce rate on that test. If it stays below 1%, the domain is likely safe. If it spikes, suppress the remainder.
Automate differential handling. Your ESP should maintain at least three distinct address states: active (verified, engaged), risk (catch-all, unknown, long-inactive), and suppressed (hard bounce, persistent soft bounce, unsubscribed). Each state gets different treatment, and the rules for moving between states should run automatically, not depend on someone remembering to check.
How Runleadpilot handles deliverability so you do not have to
Managing bounce rates manually across a B2B prospecting operation is genuinely time-consuming. Runleadpilot is built to handle the deliverability layer as part of its managed outbound service, so lean teams and agencies do not have to maintain a separate verification and authentication stack.
What Runleadpilot manages on the deliverability side:
- Dedicated sending domains and inboxes provisioned per client, which eliminates cross-tenant reputation noise that affects shared sending infrastructure.
- Automated list hygiene at capture: verification runs before any address enters a sequence, and hard bounces are removed automatically.
- Engagement-based segmentation built into the platform, so the heaviest send volumes go to the most responsive contacts by default.
- Managed warm-up schedules for new domains and inboxes, with progressive volume increases that follow the same ramp logic described in the technical setup section above.
Campaign previews and monitoring:
- Free campaign previews let you see targeting, messaging, and volume before committing to a full send, which surfaces authentication or content issues early.
- Automated reporting tracks bounce rate, complaint rate, and reply rate at the campaign level, with alerts when thresholds are crossed.
Pro Tip: For agencies managing outbound across multiple clients, Runleadpilot’s multi-client workspace with consolidated billing means each client gets isolated sending infrastructure. One client’s bounce problem cannot contaminate another client’s sender reputation.
The practical benefit for small B2B teams:
- No need to maintain separate verification API subscriptions, DMARC reporting tools, and warm-up services as independent line items.
- The cold email automation and deliverability features are managed together, which reduces the operational overhead of keeping a clean, authenticated sending environment.
The mistakes that actually hurt you, and the fixes that actually work
Most teams that struggle with high bounce rates are making one of three mistakes: they push volume before cleaning their list, they ignore authentication until something breaks, or they buy a list because building one organically feels slow.
The volume-before-cleaning mistake is the most expensive. It signals to Gmail, Outlook, and Yahoo that you do not know your audience, which triggers throttling and spam filtering that affects the other 45,000 sends too. The damage is disproportionate to the error.
Authentication failures are quieter but just as damaging. A domain without DMARC in place is a domain that receiving servers cannot fully trust. Many teams set up SPF and DKIM correctly but skip DMARC, leaving the policy layer incomplete. Starting with p=none costs nothing and gives you 30 days of reporting data before you have to make any enforcement decision.
Purchased lists are a category error, not just a bad tactic. The addresses on a purchased list never consented to hear from you, which means complaint rates will be high and engagement will be low. Both signals feed directly into inbox provider reputation scoring. Organic, consented lists are slower to build but they compound positively over time.
The three highest-leverage fixes, in order: verify at capture so bad addresses never enter your list; run bulk verification before every major send so stale addresses do not survive to bounce; and suppress hard bounces the moment they occur, automatically, with no manual step required.
Runleadpilot handles the deliverability work your team keeps deprioritizing
High bounce rates in B2B outbound usually come down to one thing: the deliverability work that teams know they should do but never quite get to. Runleadpilot removes that bottleneck entirely.
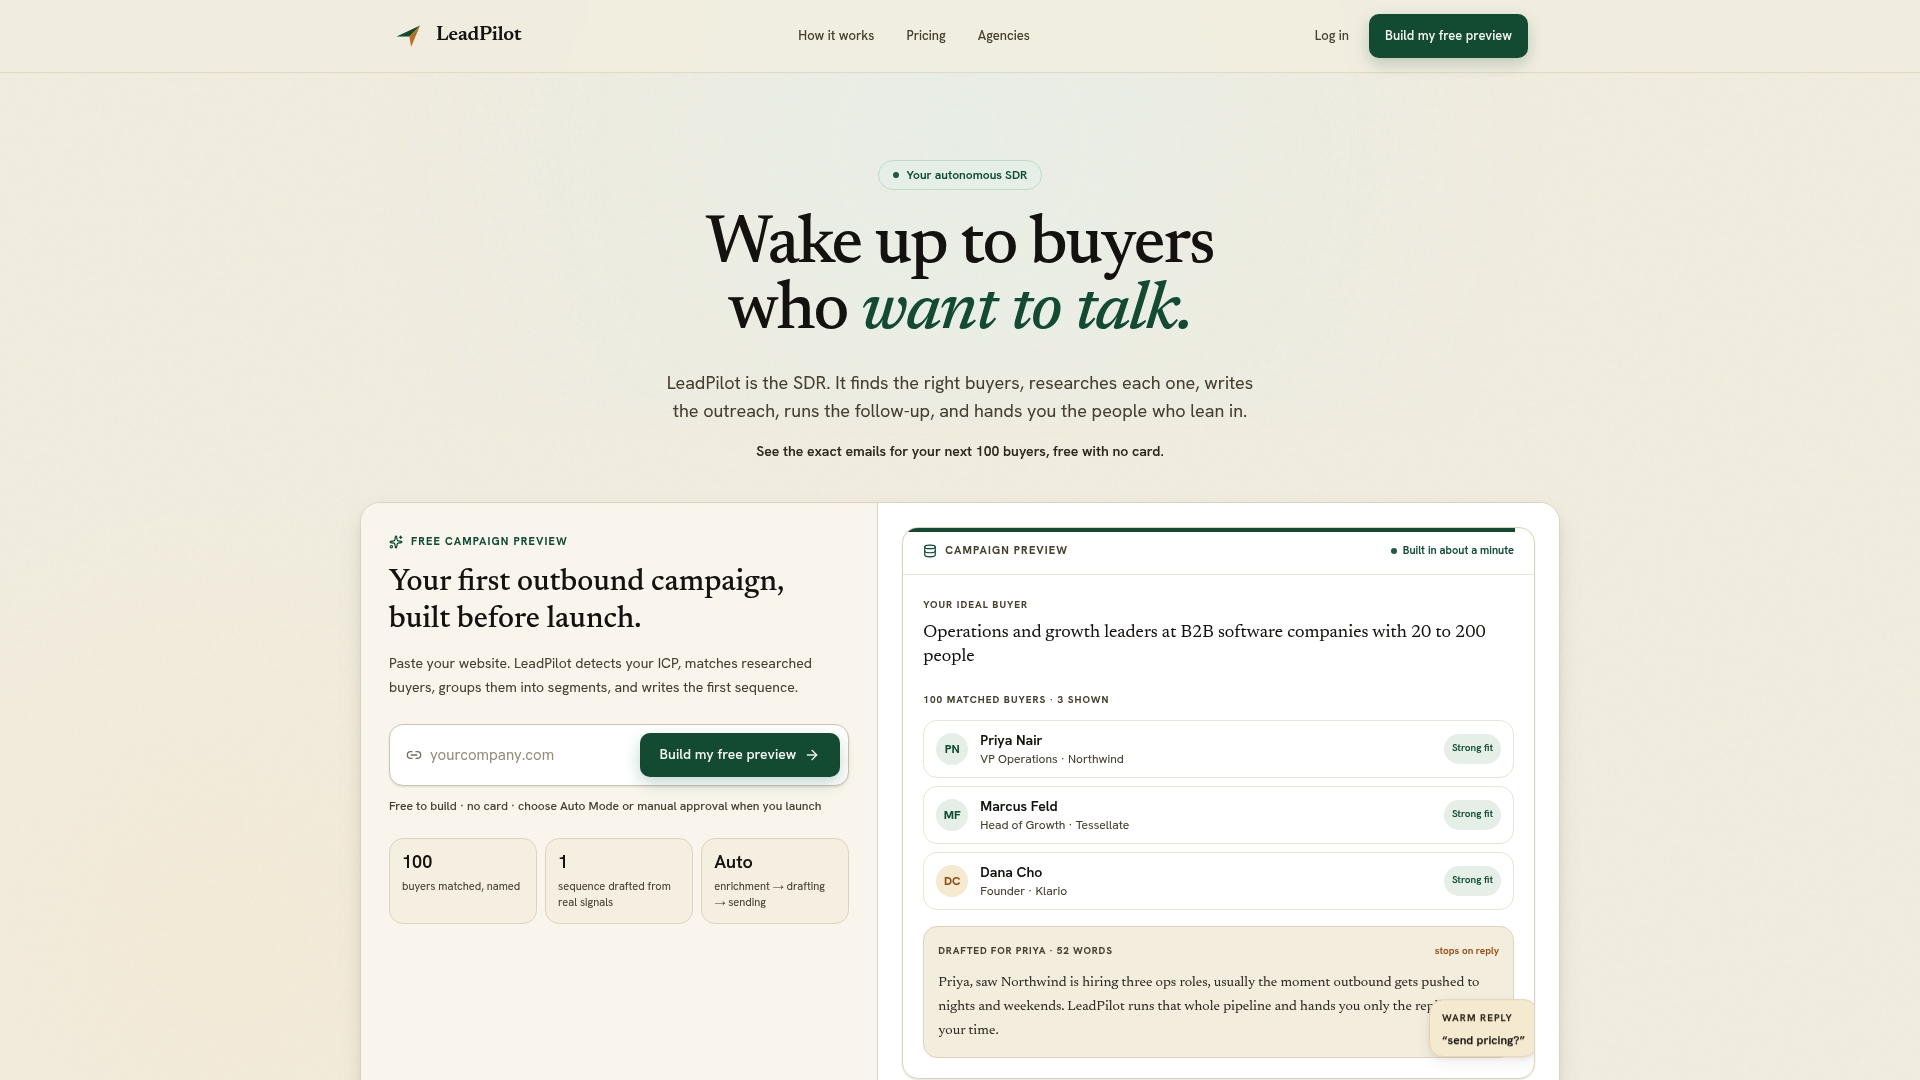
Every Runleadpilot campaign runs on dedicated sending domains and inboxes, with built-in verification, automated suppression, and managed warm-up. You do not need a separate verification subscription, a DMARC reporting tool, or a warm-up service. The platform handles the full outbound workflow from targeting through reply handoff, and your team only touches the warm conversations.
Start with a free campaign preview to see exactly who Runleadpilot would target and what it would send, before committing to anything. For agencies running outbound across multiple clients, the multi-client workspace keeps each client’s sending infrastructure isolated and billing consolidated.
Sources
The following resources cover the technical standards, legal requirements, and operational playbooks referenced throughout this article.
- How to Reduce Your Email Bounce Rate | BounceShift
- How to Reduce Email Bounce Rate Below 2 Percent: The Complete 2026 Playbook | Bulk Email Checker
- How to Reduce Email Bounce Rate Before Your Next Campaign | SendSure Blog | SendSure
- How to Reduce Email Bounce Rate: 10 Proven Methods (2026)
- Hard Bounce vs Soft Bounce: 2026 Guide to Email Bounces
- CAN-SPAM Act: A Compliance Guide for Business (FTC)