How to Find Decision Maker Emails for B2B Outreach
Discover how to effectively find decision maker emails for B2B outreach by defining targets and verifying accuracy for better engagement.

How to Find Decision Maker Emails for B2B Outreach
You find decision-maker emails by combining four things: a defined target profile, name sourcing from LinkedIn or company pages, email pattern inference or lookup tools, and multi-provider verification before you export anything. Skip any one of these and your bounce rate climbs fast, which is exactly what tanks sender reputation on a new domain.
Here’s the quick version before we get into the mechanics:
- Define the target first. Job title, department, seniority, and company size before you touch a single tool.
- Source names, then addresses. LinkedIn or a company’s team page gets you the person; a domain search or pattern match gets you the email.
- Verify before you export. Run every address through an SMTP or verification check and tag its status (valid, risky, accept-all, unknown) so you know what you’re sending into.
By the end of a single focused session, you should have a CSV of a verified batch of decision-maker emails, or a queued bulk workflow ready to scale past that. Everything below builds toward that outcome.
Key Takeaways
Finding verified decision-maker emails reliably requires a defined ICP, layered name sourcing, waterfall enrichment across providers, and mandatory verification before any address reaches a sequence.
| Point | Details |
|---|---|
| Define before you search | Lock in exact titles, departments, and seniority levels before sourcing a single name. |
| Layer your sources | Combine LinkedIn, company contact pages, and Google X-ray queries rather than relying on one channel. |
| Verify before export | Tag every address with a status (valid, risky, accept-all, unknown) before it leaves your workflow. |
| Track verification rate as a KPI | A dropping rate on any source signals stale data or a provider quality issue. |
| Automate the repeatable parts | Platforms like LeadPilot handle ICP detection, discovery, verification, and sequencing in one connected flow. |
Next steps and what to measure first
Start with these five actions in order: define your ICP precisely, source 50 names from your top-priority accounts, run those 50 through waterfall enrichment, verify every result, and launch one test sequence before scaling further.
- Define the ICP and lock in target titles.
- Source 50 names across your highest-fit accounts.
- Run waterfall enrichment on that batch.
- Verify every address and tag its status.
- Launch a small test sequence and measure results before scaling.
Track four numbers as you go: verification rate, bounce rate, reply rate, and overall deliverability health. If your verification rate stays high but replies stay flat, the targeting needs work, not the sourcing. If bounces creep up despite a “verified” tag, revisit how your tool handles accept-all domains before you scale the volume any further.
- If results are strong at 50 contacts, scale the same workflow to 500 with automation.
- If verification rates are inconsistent, add a second provider to your waterfall before scaling.
- If reply rates lag despite clean deliverability, the gap is likely in targeting or messaging, not the email-finding process itself.
Table of Contents
- How Do You Find Decision Maker Emails Step by Step?
- Which Sources Work Best for Finding Names and Titles?
- How Do You Verify Decision Maker Emails Before Sending?
- How Do You Scale Email Discovery Across Hundreds of Accounts?
- What Should You Look for in a Decision Maker Email Tool?
- Why a Managed, AI-Assisted Platform Changes the Math
- What Would I Do First to Get 1,000 Verified Emails This Month?
- Let LeadPilot Handle Sourcing, Verifying, and Sequencing for You
- Frequently Asked Questions
- Sources
How Do You Find Decision Maker Emails Step by Step?
This is the workflow itself, the one you can run this afternoon and repeat every week without reinventing it.
-
Define the ICP and decision-maker profile. For a 10-person SaaS company, the decision maker might just be the founder or head of ops. For a 500-person enterprise, you’re usually chasing a VP or Director two levels below the C-suite, since the actual budget holder rarely reads cold email personally. Write down the exact titles and departments you’re targeting before moving forward. Vague targeting (“someone in marketing”) produces messy lists and wasted verification credits.
-
Build the target account list. Filter by firmographics (headcount, industry, revenue band, tech stack) and layer in trigger signals like recent funding, a new product launch, or a job posting for a role that hints at a budget shift. Prioritize accounts where two or more signals stack.
-
Source names for each account. LinkedIn profiles, company “About” or “Team” pages, and press releases are your three primary sources. Job postings often name a hiring manager directly in the copy.
-
Infer the email pattern or use a lookup tool. Most companies follow one of a handful of formats: first.last@, firstinitiallast@, or first@. Once you confirm the pattern from one known address (a public one from a contact page counts), you can apply it across the rest of the org with reasonable confidence.
-
Run waterfall enrichment across providers. No single database has full coverage. Query Provider A, and if it returns nothing, fall back to Provider B, then C, taking the first verified hit. This waterfall enrichment approach consistently beats relying on one source alone.
-
Verify every address before it leaves your workflow. Add a verification status field (valid, risky, accept-all, unknown) to every record. Nothing gets exported without this tag.
-
Export to your CRM or CSV and build a multi-threaded sequence. Don’t rely on a single contact per account. Pull in two or three decision makers per target company so a bounce or a non-reply doesn’t kill the whole opportunity.
Pro Tip: Confirm your email pattern using a role-based address you already know is real, like a press or investor relations inbox listed on the company’s own contact page. It’s a free, zero-risk way to validate the format before you apply it to fifty other names at that domain.
A few things that trip people up on their first pass through this workflow:
- Skipping account prioritization and treating every lead the same wastes verification budget on low-fit accounts.
- Sourcing names without confirming current titles leads to outreach that lands on someone who left the role six months ago.
- Exporting before verification is complete is the single most common cause of a damaged sending domain in the first thirty days.
Which Sources Work Best for Finding Names and Titles?
Different sources fit different jobs. Here’s how to know which one to reach for.
LinkedIn and Sales Navigator remain the most current source for names and titles, mostly because profiles are self-maintained and people update them the moment they change jobs. That currency is the whole value proposition here, and it’s worth pairing LinkedIn sourcing with a secondary email discovery step rather than treating LinkedIn as your email source too, since it isn’t one. Free-tier users hit search limits fast, but a Google X-ray query like site:linkedin.com/in "VP of Marketing" "company name" gets you around that wall for a handful of targeted lookups.
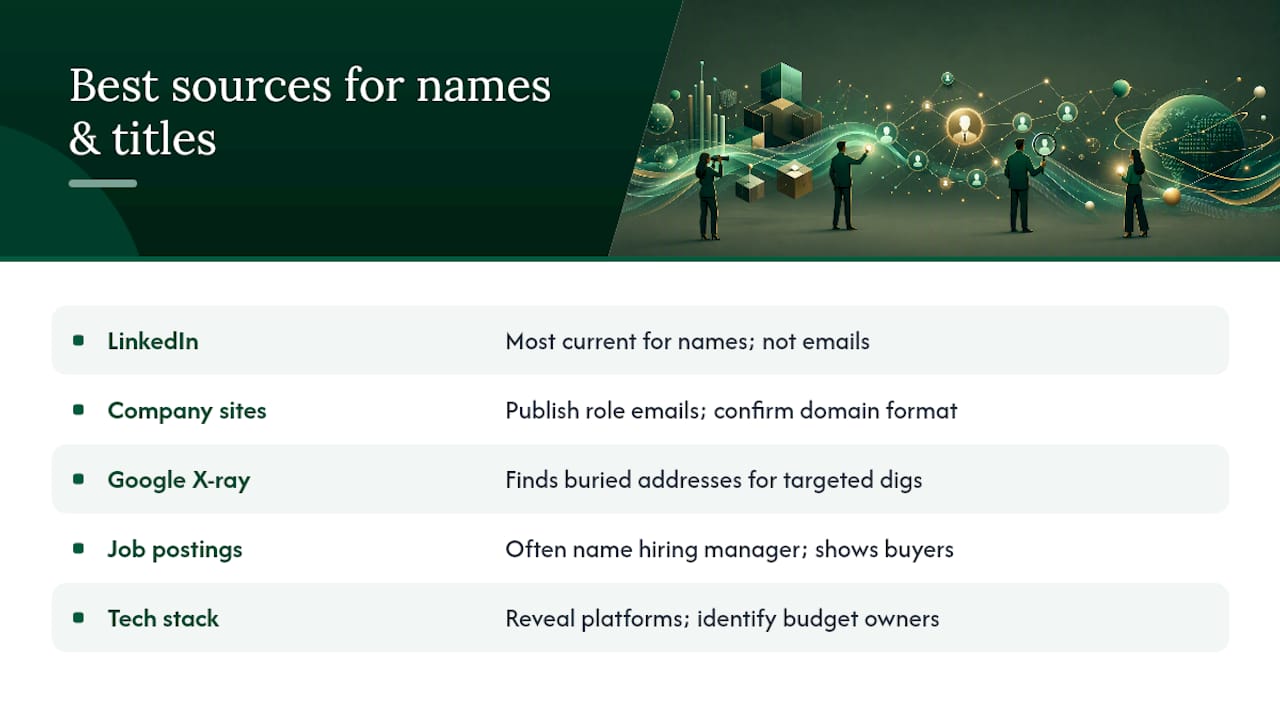
Company websites, press releases, and investor relations pages are underused. Many public corporations publish role-specific addresses directly. Mattel’s corporate contact page lists press, investor relations, and compliance emails outright, and V.F. Corporation’s contact page does the same with named investor relations contacts. These aren’t just useful for the exact person listed. They’re a free way to confirm the domain’s email format before you apply that pattern to fifty other names at the same company.
Google X-ray search operators beat paid tools when you’re chasing a small number of specific accounts rather than sweeping a whole territory. A query like site:companydomain.com "email" -jobs or "[email protected]" filetype:pdf can surface addresses buried in PDFs, whitepapers, or old press kits that a database tool never indexed.
Job postings and tech stack pages tell you who’s actually building or buying. A job listing for a “Marketing Automation Manager” often names the hiring manager in the post itself, and tools like BuiltWith or Wappalyzer reveal which platforms a company runs, which tells you who owns that budget line.
The needle-in-a-haystack accounts, the ones where you absolutely need one specific VP at one specific company, call for manual single lookups. Territory sweeps across hundreds of similar accounts call for bulk discovery instead. Mixing the two approaches on the same list is how teams burn hours on accounts that didn’t need the manual attention.
Pro Tip: Keep a running list of confirmed email patterns by domain. Once you’ve verified one address at a company, you’ve effectively unlocked the format for everyone else there, and that single data point saves real time on every future lookup at that domain.
How Do You Verify Decision Maker Emails Before Sending?
Verification happens in stages, and skipping one is how “verified” lists still bounce.
- Syntax check. Confirms the address is formatted correctly. This catches typos but tells you nothing about whether the mailbox exists.
- MX and SMTP check. Confirms the domain accepts mail and, in many cases, pings the specific mailbox to check if it’s live.
- Accept-all handling. Some mail servers accept mail to any address at their domain regardless of whether that mailbox exists. This is where a lot of “verified” lists quietly fail, since a tool can only tell you the domain accepts everything, not that this specific person is there.
- Mailbox existence flag. The final signal, when available, confirms an actual person is receiving mail at that address.
Once you’ve run these checks, you’ll land on one of four statuses:
- Valid means send with confidence.
- Risky means proceed carefully, maybe with a smaller batch or a follow-up verification pass.
- Accept-all means treat it as unconfirmed. Your pattern match might be right, but you don’t have proof.
- Unknown means the check failed or the server didn’t respond. Don’t send to this one blind.
Run verification after enrichment but before export. That order matters. If you verify first and enrich second, you’ll waste verification credits on addresses you haven’t even confirmed exist yet. Tag every record with a verification timestamp and source provider, because email addresses go stale and a check from four months ago isn’t the same as one from this week.
Deliverability hygiene matters just as much as the check itself. Dedupe your list before every send, since duplicate records inflate bounce math and make your metrics look worse than reality. Remove generic inboxes like info@ or sales@ when your campaign specifically needs a named decision maker. And re-verify any list older than 60 to 90 days, since job changes and email migrations degrade accuracy over time.

Pro Tip: Track your verification rate as an ongoing KPI, not a one-time check. If the rate on a given source or provider drops below what you’re used to seeing, that’s your early warning that the source has gone stale or the provider’s data quality has slipped.
How Do You Scale Email Discovery Across Hundreds of Accounts?
Manual research works fine for ten accounts. It falls apart at two hundred. Scaling requires a different set of habits, mostly around automation and clean data handoffs.
Bulk import starts with a clean CSV schema: domain, company name, target titles, and any known firmographic filters. Most enrichment platforms accept a domain list directly and let you set filters for department, seniority, and job title keywords before running the batch. Integration options matter here, whether that’s a direct API connection, a CSV round trip, or a native CRM sync, since the friction of moving data between tools is where errors creep in.
The waterfall pattern scales the same way it works for one-off lookups, just automated. Query Provider A across the whole batch, pull the misses into a second batch for Provider B, then a third for Provider C, and keep only the first verified hit per contact. Workflow automation tools can chain these discovery and verification steps together so the whole sequence runs without manual handoffs between each provider.
| Scale Level | Typical Approach | Main Trade-off |
|---|---|---|
| Under 50 accounts | Manual sourcing plus single-provider lookup | Higher accuracy, slower per-contact time |
| 50 to 500 accounts | Bulk import with waterfall enrichment | Balanced cost and coverage, needs verification step |
| 500+ accounts | Automated nightly enrichment with API sync | Lower cost per contact, higher operational overhead |
- Schedule enrichment runs overnight so new or changed titles get flagged before your team logs on.
- Maintain an audit trail that records which provider sourced each address and when it was verified.
- Sync exports to your CRM with verification metadata intact, not just the raw email address.
Pro Tip: Build your audit trail as a habit from day one, even at small scale. When a prospect asks how you got their information, or when you need to debug why a segment underperformed, having the source and verification date on every record saves you from guessing.
The trade-off at scale is straightforward: cost per enriched contact goes up as your verification rate goes up, and operational overhead grows with every provider you add to the waterfall. Most teams find the sweet spot at three providers before the marginal coverage gain stops justifying the added cost and complexity.
What Should You Look for in a Decision Maker Email Tool?
Not every tool fits every team. Here’s the checklist worth running before you commit budget to one.
- Coverage across regions and industries. A tool with strong US tech-sector data might be nearly useless if your accounts are in European manufacturing.
- Verification accuracy. Ask specifically how the tool handles accept-all domains, since this is where inflated “verified” claims usually hide.
- Enrichment depth. Does it return just an email, or does it also surface title, department, seniority, and company context?
- Integration options. Native CRM sync, API access, and CSV export all matter differently depending on your existing stack.
- Pricing model. Per-contact pricing scales differently than flat monthly tiers, and the right choice depends entirely on your monthly volume.
For a scoring approach, weigh each axis on a simple 1 to 5 scale and set a pass threshold around 3.5 average for a small team, or closer to 4 for an enterprise buyer with compliance requirements. A small team optimizing for speed can tolerate a slightly lower verification accuracy score if the coverage and price are strong. An enterprise team handling regulated industries can’t.
- Score coverage, verification accuracy, enrichment depth, integration, and pricing independently.
- Weight verification accuracy heaviest if deliverability has been a recurring problem for your team.
- Check for audit logs, search history, and bulk reveal limits, since these operational details predict how the tool behaves at your actual volume, not just in the demo.
Compliance and data handling deserve a hard look too. Ask how the tool sources and stores addresses, and whether it verifies against relevant regulations like GDPR for European contacts or CAN-SPAM requirements for outreach into the US market. This isn’t a legal opinion, but a practical filter: a tool that can’t answer this clearly is a support ticket waiting to happen down the line.
Pro Tip: Ask for a trial batch of 50 to 100 contacts before committing to a monthly plan. Run your own verification against their “verified” tag and compare the two rates directly. That’s the fastest way to tell marketing claims apart from actual data quality.
Why a Managed, AI-Assisted Platform Changes the Math
Manual research doesn’t scale linearly. Every additional hundred accounts adds hours of name sourcing, pattern testing, and verification babysitting, and that time comes directly out of the hours you’d rather spend on actual selling conversations.
An AI-assisted platform compresses that timeline by automating the parts that don’t need human judgment, name discovery, pattern inference, and initial verification, while still running waterfall enrichment across multiple sources to preserve the hit rate you’d get from doing it manually. The judgment calls that actually matter, like which reply is worth a founder’s personal attention, stay with a human.
Consider two use cases where this matters most. A lean startup with no dedicated SDR needs 500 verified contacts inside a month without hiring anyone. An agency running outbound for six clients simultaneously needs those same workflows to run in parallel without six separate manual processes colliding.
A managed platform that detects your ideal customer profile straight from your website, then automatically sources and researches matching decision makers, removes the setup work that usually eats the first two weeks of any new outbound effort.
Whatever platform you evaluate, expect these signals as table stakes: CRM sync that preserves verification metadata, a timestamp and source recorded against every address, and a search history you can audit later. LeadPilot’s approach reads your website to detect your ideal customer profile, sources and researches matching decision makers automatically, drafts personalized outreach from real signals rather than generic templates, manages dedicated sending domains and inboxes for deliverability, runs the follow-up cadence, and routes warm replies to your team for the human conversation.
- Website-based ICP detection removes the manual targeting brief.
- Automated decision-maker discovery replaces hours of LinkedIn and domain searching.
- Verification and domain management happen inside the same system, not as a bolt-on step.
Pro Tip: If you’re evaluating a managed platform, ask specifically what happens after a reply comes in. A tool that only sources and sends but hands you a flooded inbox with no triage isn’t actually solving the full problem.
What Would I Do First to Get 1,000 Verified Emails This Month?
I’d start by ranking every target account on two axes: ICP fit and intent signal strength. Accounts with both a strong fit and a recent trigger (funding, a leadership hire, a relevant job posting) go to the top of the list, and I’d multi-thread every one of them, pulling two or three named contacts per account rather than betting on a single email.
Anything below that threshold goes into a manual review queue instead of straight into outreach. This isn’t overly cautious. It’s the difference between a sending domain that survives its first month and one that’s flagged by week two.
On the sending side, I’d stagger the sequence launches rather than firing all 1,000 contacts at once, and I’d cap new-sending volume per domain, especially if any of the domains involved are newer or haven’t built up sending history yet. A warmed sending domain tolerates volume that a cold one simply can’t, and the extra week spent warming up is cheaper than rebuilding a domain’s reputation after it gets burned.
The honest gap most people underestimate here isn’t the sourcing. Names and email guesses are genuinely easy to generate at volume. Every team I’ve seen skip that discipline pays for it in bounce rate within the first two weeks.
Let LeadPilot Handle Sourcing, Verifying, and Sequencing for You
Everything in this guide, defining the ICP, sourcing names, inferring patterns, running waterfall enrichment, verifying before export, works. It also takes real hours every week to run manually, and most lean teams don’t have those hours to spare.
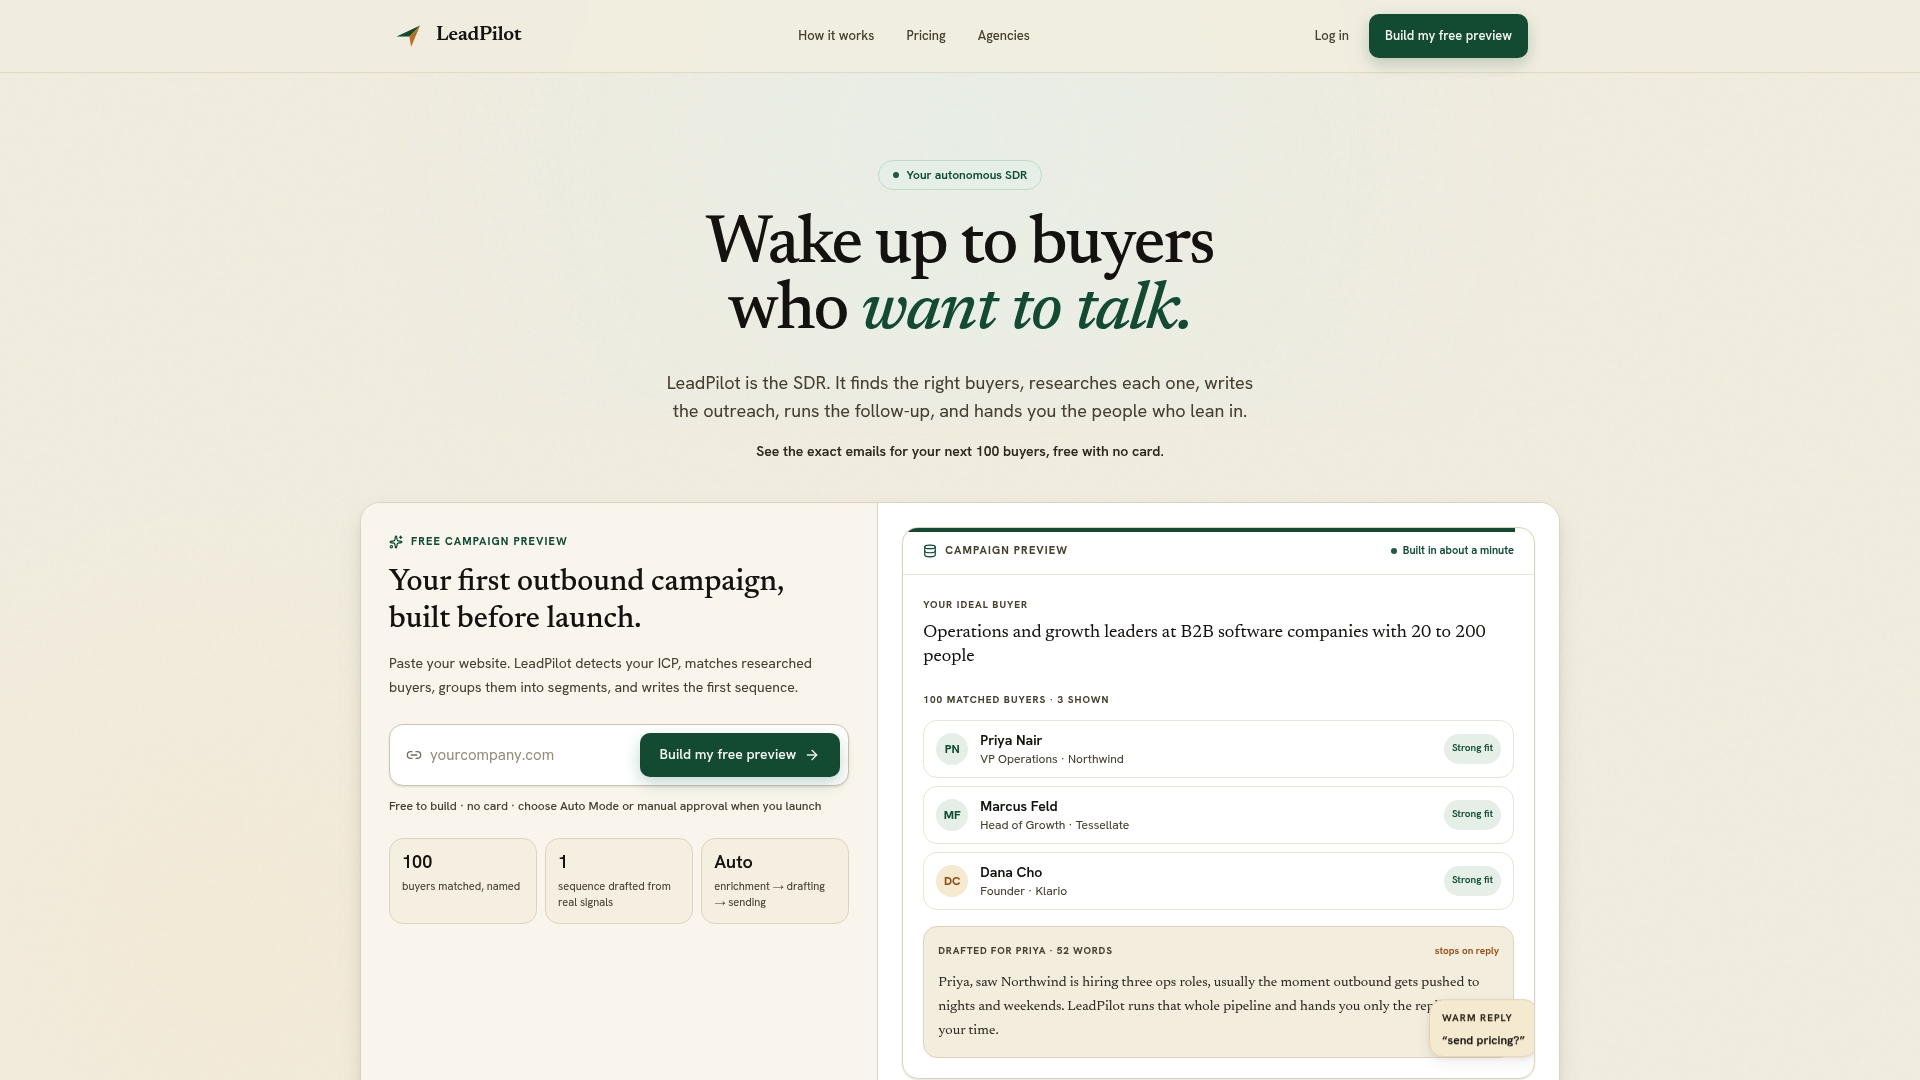
Runleadpilot is the alternative to stitching together five separate tools for this workflow: it reads your website to detect your ideal customer profile automatically, sources and researches matching decision makers, drafts personalized emails from real business signals instead of generic templates, manages dedicated sending domains and inboxes so deliverability isn’t your problem to babysit, and runs follow-ups until a prospect replies. When a reply comes in, it routes straight to your team instead of sitting buried in a shared inbox.
That removes the manual waterfall setup, the deliverability guesswork, and the multi-tool integration headaches this entire article just walked you through. If you want to see what that looks like against your own website and ideal customer profile before committing to anything, you can build a free campaign preview and see the targeting and messaging LeadPilot generates for your specific business.
Frequently Asked Questions
What’s the fastest way to find decision maker emails for a small batch of accounts? For under 50 accounts, manual sourcing through LinkedIn and company contact pages paired with a single verification pass is usually faster than setting up bulk automation, since the setup overhead outweighs the time saved at that volume.
How accurate are inferred email patterns compared to verified lookups? An inferred pattern confirmed against one known real address at that domain is generally reliable, but it should still go through SMTP verification before you send, since accept-all domains will confirm a guessed pattern even when the specific mailbox doesn’t exist.
Should I prioritize one decision maker per account or multiple? Multiple. Multi-threading two or three contacts per target account protects your outreach from a single bounce, a job change, or a non-response killing the entire opportunity at that company.
How often should I re-verify an existing prospect list? Re-verify any list older than 60 to 90 days, since job changes and email migrations degrade accuracy meaningfully over that window.
Is it compliant to email decision makers found through public sources? Sourcing publicly available business contact information is common practice in B2B outreach, but compliance requirements like GDPR and CAN-SPAM still apply to how you store, use, and message those contacts. This isn’t legal advice, so confirm current requirements for your specific market with a qualified professional before scaling outreach broadly.
Sources
- Contact Information | Mattel, Inc.
- Contact | V.F. Corporation
- Find B2B decision maker emails & build lead database with Serper.dev & AnyMailFinder